Inspired for an Adventure? Check out Beef Stroganoff - Pouch and Beef Stew - Pouch
Free Ground Shipping On All Orders
Over 2,100 Reviews
Add description, images, menus and links to your mega menu
A column with no settings can be used as a spacer
Link to your collections, sales and even external links
Add up to five columns
Add description, images, menus and links to your mega menu
A column with no settings can be used as a spacer
Link to your collections, sales and even external links
Add up to five columns
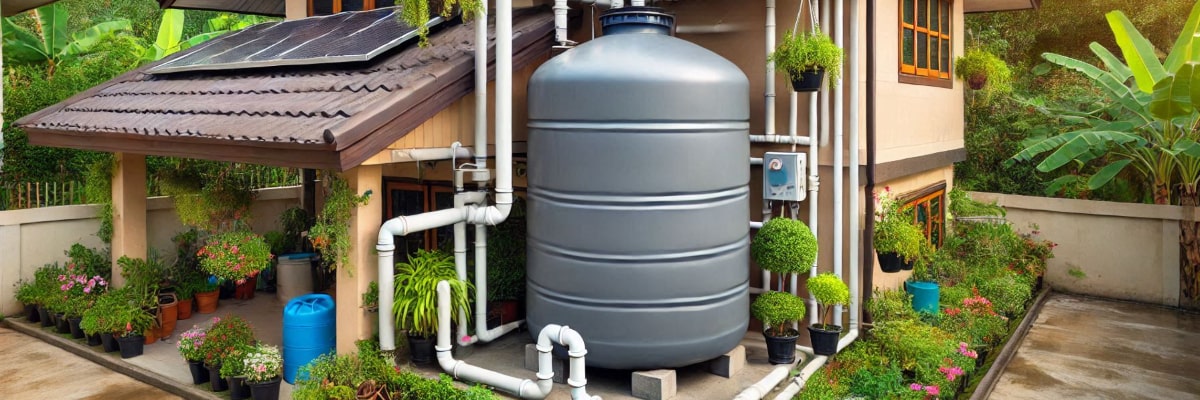

Human beings have collected rainwater since time immemorial, and many around the globe still rely on cisterns and the like for their daily water needs. But people on municipal water systems or using private wells can still definitely reap the rewards of a DIY rainwater collection system for supplemental purposes: not only environmental and financial rewards but also the benefit of storing water for emergencies.
In this guide, we'll walk you through how to make a rain barrel—one of the easiest and most popular DIY setups for harvesting and using rainwater, regardless of where you live.
What is a Rain Barrel System?
A rain barrel collects rainwater shed from a catchment area, typically a building’s roof, thereby providing a natural (and free!) source of water that can be used for watering plants and garden beds, rinsing off garden tools, moistening compost, and other purposes. Rainwater from the catchment area flows through a conveyance system—typically a gutter and downspout in a rain barrel setup—into the barrel, where it can be accessed via a spigot or bibb.

Watering plants is a common non-potable application of a rain barrel. Harvesting rainwater—which can be contaminated by bird droppings, pollen, airborne chemicals, and other rooftop impurities—to use for drinking and cooking requires more treatment and testing to ensure safety. That said, rain barrels can also serve as emergency storehouses of water that, with proper treatment, can meet survival needs in disaster situations.
Taking advantage of rainwater for practical purposes, such as watering, can save you money if you’re on city water. Besides a friendlier-looking water bill, the practice has environmental benefits. Rainfall is a sustainable source of water, for one thing—capturing and using some of it for everyday purposes is at least a small step toward better adapting your lifestyle to your climatic zone.
And rainwater collection systems can also cut down on the pollution that stormwater runoff from rooftops, pavement, and other impervious surfaces so common in built-up areas can send into local streams, ponds, lakes, and wetlands. In older cities with combined sewer systems, stormwater from major downpours can discharge sewage directly into waterways. Rain barrels can help reroute roof rain runoff and thus reduce the amount of stormwater entering the drainage and/or sewer systems.
Similarly, by capturing runoff, rainwater collection systems can also help limit flooding, at least to some extent.
Legality of Rainwater Harvesting
Federal laws in the U.S. don’t restrict rainwater collection, but state laws may impose restrictions on the practice out of concern for groundwater recharge and, in some cases, because of prior appropriation rights.
As World Water Reserve notes, the majority of states have no restrictions on rain-collection systems, but the following do:
- Arkansas
- Colorado
- Georgia
- Illinois
- Nevada
- North Carolina
- Ohio
- Oregon
- Rhode Island
- Texas
- Utah
- Virginia
- Washington
- Wisconsin
In most of these states, though, the laws allow for rain-barrel setups collecting water from rooftops and used for non-potable applications. Some kinds of other rainwater-collection systems may require a permit in these states.
Always double-check the rain-collection rules in your state before starting this kind of project.
Materials Needed for Project
Exact materials and tools will depend on what kind of setup you’re planning, of course, but this is a typical supplies list for a rain barrel collection system:
- Food-grade 50- or 55-gallon (or bigger) barrel (e.g., pickle, olive oil, soda barrel) or heavy-duty trash can
- Safety goggles
- Latex-free gloves
- Spigot, washers, and nuts
- Downspout diverter or gutter adapter
- Overflow pipe
- Screen mesh or window screen for debris filtering
- Cinder blocks for elevating barrel
- Tape measure
- Drill
- Hole saw, jigsaw, and/or spade bit
- Hacksaw (for cutting downspout, if necessary)
- Rasp
- Caulk
- Silicone
- Teflon tape
- Pliers
- Wrench
Optional Add-ons
- Garden hose connection
- Decorative paint (if desired)
How to Build a Rain Barrel Collection System
The following step-by-step instructions will walk you through the process of how to make a rain barrel system.
Step 1: Preparing the Barrel
A food-grade barrel is critical, as this means the barrel material will not leach into the stored water. Rinse out and then clean your barrel thoroughly (ideally with biodegradable/eco-friendly soap).
A screw-top barrel is most convenient to use, as you can easily access the interior for cleaning, maintenance, and installing the spigot. But a closed-top barrel is still absolutely workable.
Mark where you’ll drill holes for the spigot and the outlet. The spigot or faucet hole should generally be on the order of 4 to 6 inches above the bottom of the barrel (allowing you to set up a garden hose or fill a watering can from the spigot, and hopefully keeping debris below the outlet). If you’re using a closed-top barrel, the extent of your reach will influence where you drill the outlet hole, depending on what kind of spigot/fitting you’re installing.
The overflow hole should be set about 4 inches or 4.5 inches below the top of the barrel. Position it on the left, right, or front-facing side of the rain barrel, not on the side facing the building.
Using the properly sized hole saw or spade bit for your spigot, drill the outlet hole. A ¾-inch spigot will require, for example, a 15/16-inch spade bit. Use a rasp if necessary to clear burs and ensure a tight fit.
The overflow outlet should be larger, accommodating (say) a 1.5- to 2-inch pipe, to effectively work during heavy rainstorms. Drill the outlet hole accordingly with the hole saw.
Cut an inlet hole in the top of the barrel with a hole saw or jigsaw to allow in the rainwater. The size of the hole will depend on what kind of screening/filter you’re using and whether you’re directly inserting a strainer of some kind, or a downspout or pipe, right into the barrel. In the latter case, you’ll size the inlet hole based on the diameter of the strainer or the conveyance.
Step 2: Installing the Spigot
Install your spigot using thread-seal tape and apply a silicone sealant or caulk.
Step 3: Adding a Filter
A filter is essential in your rain barrel system to limit how much debris gets into the barrel and prevent mosquitoes from accessing the water within for breeding purposes. You have many choices for what to use for this filter and how to install it. You can, for example, secure the base of a strainer into your inlet hole or wrap the bottom of a plastic flower/plant pot in a swatch of mosquito screen and nest it inside another pot that is then wedged firmly into the properly sized hole.
If you’re using a screw-top barrel, an easy solution is simply to open the barrel, hold a two-by-two-foot piece of window screen or mesh screen over the mouth, and then have somebody else screw the top down firmly over it.
Step 4: Positioning the Rain Barrel
Use cinder blocks (or bricks) to elevate your rain barrel, which makes access to the spigot easier and also increases water pressure for better outflow. Make sure the blocks and barrel are set on a level piece of ground.
While a properly designed rain barrel set on level cinder blocks is unlikely to tip, if you’re concerned about this, you can strap it to the side of your house or another secure anchor (such as a fence post).
Step 5: Setting Up the Overflow System
While a garden hose can work for your rain-barrel overflow, it’s better to use a larger-diameter PVC pipe or tube to handle more water. Direct the overflow pipe away from the foundation of your home, where the excess rainwater can soak into a garden bed or other planted zone.
Another option is to connect the overflow pipe to another rain barrel to increase your rainwater storage.
Step 6: Connecting to the Downspout
A downspout adapter/extender makes conveying water from your gutter/downspout system into your rain-barrel inlet easy. Once you have your rain barrel positioned, you can decide where to cut (with a hacksaw) or disassemble your downspout and connect your adapter. Downspout screws will help secure the adapter/extender.
How to Use & Maintain Your Rain Barrel
You can fill a watering can directly from your rain-barrel spigot or attach it to a garden hose. The low-pressure discharge can often effectively run a soaker hose if you remove its pressure-reducing washer.
As mentioned, you can route your overflow pipe into another rain barrel—and perhaps link in additional barrels—to increase storage capacity.
Maintenance is pretty minimal when it comes to rain barrel collection systems. Check the barrel over occasionally for any cracks or leaks and clean out the debris that will inevitably build up even with a filter installed.
While your inlet screen and secure fittings and pipes should keep mosquitoes out of your rain barrel, the New Jersey Agricultural Experiment Station also notes you can add a tablespoon of vegetable oil to the water inside to break its surface tension and thereby deter mosquitoes from landing to lay eggs.
Install a Rain Barrel for Homesteading Sustainability
A rain barrel can be a great addition to any yard, collecting rainwater for practical uses around the garden and the yard while saving money and conserving groundwater. Be sure to check your local laws for any rules around rainwater collection.
If properly treated for drinking, the water from a rain barrel can also make for a helpful addition to your emergency-preparedness supplies—along with your Mountain House meals and food supply kits, of course!

How to Prepare for a Power Outage in Winter: Safety Tips

How to Rotate Emergency Food: FIFO and Other Rotation Methods


Stay Hungry for Adventure
Sign Up for Delicious Outdoor Meals & Exclusive Offers!
By clicking ‘Join Now’, I agree to the Terms of Service and Privacy Policy.


Join the adventure
©2026 Mountain House — All Rights Reserved.
Your Cart is Empty
Continue ShoppingYour Cart
Subtotal
$0.00
EXPRESS PAYMENT METHODS AVAILABLE IN CHECKOUT
Taxes and Shipping Calculated at Checkout
Your ExpertVoice deal.
$[Deal Price]
$[Original Price]
Discount applied at checkout.
On sale now — lower than your ExpertVoice discount.
Not eligible for ExpertVoice discount.
