Inspired for an Adventure? Check out Beef Stroganoff - Pouch and Beef Stew - Pouch
Free Ground Shipping On All Orders
Over 2,100 Reviews
Add description, images, menus and links to your mega menu
A column with no settings can be used as a spacer
Link to your collections, sales and even external links
Add up to five columns
Add description, images, menus and links to your mega menu
A column with no settings can be used as a spacer
Link to your collections, sales and even external links
Add up to five columns


Widely used in electronic labs, the concept of the Faraday cage also has plenty of relevance to emergency and disaster preparedness. Modern-day preppers commonly include this contraption along with their other tools and supplies.
Why? A Faraday cage can protect electronic devices, including cell phones, tablets, and laptops, from the disruption and even irreversible damage that electromagnetic pulses (or EMPs) can cause. Such pulses can stem from various natural sources including solar flares and geomagnetic storms, or from manmade ones, including nefarious or military EMP attacks. Even though these events may have low odds of occurring, those who take “just in case” prepping seriously may well want to have a Faraday cage on hand.
These cages can be purchased, but for those looking to save a little dough or those keen on a little hands-on science project, it’s possible to go the DIY route and assemble your own. If you’re curious about how to build a Faraday cage at home, read on!
Understanding the Basics
The Faraday cage is a conductive shield (indeed, it’s also simply called a Faraday shield) that protects an object that’s inside it from incoming electromagnetic fields. The structure is named for the self-taught 19th-century British scientist Michael Faraday, who, in 1836, discovered that the electric charge of a conductive container was restricted to its exterior, with anything inside buffered from external charges.

Essentially, the Faraday cage serves as a barrier by distributing an electric charge around its conductive surface, opposing charges that attempt to cross into the enclosed space. The result is that no electromagnetic current flows within the Faraday cage’s interior.
Electromagnetic pulses from solar flares, EMP attacks, and other sources can scramble communications equipment, channel damaging or destructive voltage through electronics, and corrupt stored data. A Faraday cage provides protection for essential or valuable electronic devices to prevent such disruption.
How to Build a Faraday Cage
The key to a Faraday cage is that it be built from a conductive material, one that can effectively channel an electric field through its exterior. Besides being made from the appropriate material, this conductor needs to be well-sealed in order to effectively operate.
Materials
Good options for the exterior structure of a Faraday cage range from galvanized metal trash cans and aluminum foil (both probably the all-out classic DIY Faraday shield materials) to cookie or popcorn tins, ammo cans—heck, even cocktail shakers.
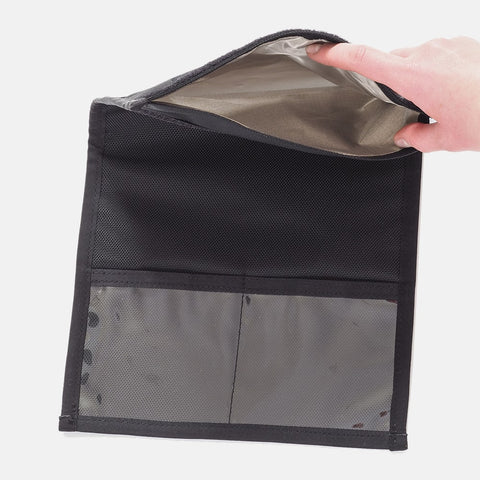
It’s worth noting that companies do sell specialized “Faraday fabric” made from copper or other conductive material; this is another option. (Indeed, one choice for purchasing a Faraday cage that’s workable for smaller items is a Faraday bag made out of such fabric.) Then again, there’s a good chance you’re going with a DIY approach to save money by using what you have on hand.
The type of homemade Faraday cage material you choose depends partly on the size of the device or devices you’re looking to protect inside. A few swatches of aluminum foil might be enough for your cell phone, while large electronics could call for a metal trash can or metal filing cabinet.
Inner Non-Conductive Insulation
Especially if you’re making your own Faraday cage, you’ll want to add an extra layer of protection by insulating the stored device from the exterior cage material. It goes without saying that you don’t want to defeat the purpose of the cage by allowing charges to transfer from the shield into a device that’s directly in contact with it.

The trick, then, is to buffer the device with a non-conductive layer of one kind or another. You could line the interior of the cage with cardboard, for example, or place the protected item within a plastic or cloth bag.
Sealing Your Faraday Shield
The most common challenge preppers face when building their own Faraday cages is an inadequate seal. If the cage isn’t completely sealed, unsurprisingly, you’re introducing the clear possibility of electrical charges transferring across the interior of the cage.
There are multiple accessory materials you might use to ensure a tight seal for your Faraday cage, the kind and arrangement of which partly depend on the nature of the cage (whether a box-type unit or simply an envelope of layered aluminum foil). Options include wire mesh, conductive gaskets, and conductive tape, such as that made from copper foil.
When applying a seal such as aluminum foil or conductive tape, take care not to puncture or otherwise damage the material—which is easy enough to do.
Testing Your DIY Faraday Cage
You’re certainly going to want to test your homemade Faraday cage to make sure it works before trusting your essential electronics to its housing. Although there are lots of high-tech and complicated procedures used for professional testing of these sorts of shields, for average prepper purposes you can go with a much simpler routine.
For example, you might tune a battery-operated radio to a station with a strong signal, then place it within the Faraday cage, seal it up, and see whether it’s still getting reception. Or put a cell phone in the cage and try to call or text it. You could also check whether a device placed inside the Faraday cage is receiving a WiFi signal.
Maintenance & Accessibility
Periodically inspect your DIY Faraday shield for corrosion, mechanical damage to the conductive layers, and other degradation. Consider labeling and using separate containers for different device categories as part of organizing your disaster-preparedness setup at home.
Faraday Shield for Emergency Preparedness
Many responsible preppers who dutifully assemble and maintain multiple disaster kits and rehearse emergency plans with their household members and work colleagues may still overlook the potential for electromagnetic pulse events and radio frequency disruptions to interfere with or destroy electronic devices and critical data.
Covering your bases when it comes to the potential of a major solar storm or even an EMP attack means assessing your valuable electronics—not just hard drives and cell phones, but also solar panels, chargers, and flashlights—and determining the best Faraday cage setup for each.

Whether you build your own Faraday shield or go with a premade version, consider the protection of your electronic devices as another fundamental aspect of your overall disaster/emergency preparedness plan.
Further Resources
The Mountain House blog contains plenty of other useful resources when it comes to disaster preparedness. Check out, for example, the following articles:
- How to Prepare for a Natural Disaster at Home: 9 Crucial Things to Know
- How to Build an Emergency Kit
- Setting Up an Emergency Disaster Plan
- Mountain House 72-Hour Kit Checklist
- Refreshing Your Storm Safety Savvy
- Planning for Long Term Power Outage
Mountain House: Your Partner in Disaster Preparedness
To further cover your bases when it comes to disaster preparedness, make sure you’re well stocked with Mountain House emergency and survival foods! We offer a truly exceptional shelf life and a wide array of freeze-dried meals and ingredients, making the Mountain House collection ideal for securing your just-in-case provisions.

How to Rotate Emergency Food: FIFO and Other Rotation Methods

The First 72 Is on You: Survival Kit Checklist + Printable PDF


Stay Hungry for Adventure
Sign Up for Delicious Outdoor Meals & Exclusive Offers!
By clicking ‘Join Now’, I agree to the Terms of Service and Privacy Policy.


Join the adventure
©2025 Mountain House — All Rights Reserved.
Your Cart is Empty
Continue ShoppingYour Cart
Subtotal
$0.00
EXPRESS PAYMENT METHODS AVAILABLE IN CHECKOUT
Taxes and Shipping Calculated at Checkout
Your ExpertVoice deal.
$[Deal Price]
$[Original Price]
Discount applied at checkout.
On sale now — lower than your ExpertVoice discount.
Not eligible for ExpertVoice discount.


